Sunday, January 28, 2007
Finally!!! I WON a Game!!
Since building the first poker table on 9/30/2006 and playing the first game on it 10/1/2006..... Today marks the First time I have won a game! Waahooo.. The cool part is not only did I win, but no one at the table even came close to having the chip lead i had :) Of course... that doesn't quite make up for the fact that i have lost every game since 10/1... that's alot of games lost... hehehe. maybe this is a change in luck? We shall find out next Sunday!
Thursday, January 25, 2007
Cat's in the Cradle?
The other night as we were preparing for bed time... We walked into our bedrooms to find our wonderful kitty cat lying comfortably...

Comfortable there Cozmo?

Comfortable there Cozmo?
Monday, January 22, 2007
Props for Originality!
I must give my wife big props for this one. Being a smoker, I have for quite some time heard every reason in the book. Everything from each cigarette takes 1 day off your life, to the descriptive black chunks of tar that are building up in my lungs, to the awful smell it produces on my clothing, and that I'm killing the ones I love with second hand smoke... the list goes on... But never has a phrase caught my attention as what I heard this past weekend.
I woke up the other morning and began my morning ritual of brushing teeth, taking a shower, ect.. Once dressed and ready for the day I moseyed on into the kitchen for a glass of sweet tea. It was an excellent morning, Not too cold outside, got plenty of sleep, I was feeling wonderful. Then I began to step outside to enjoy the freshness of the outdoors... and of course to have my morning smoke. Just prior to stepping outside the wife and i had said our good mornings and were just chatting about typical stuff... She looked up at me as I started to head for the door, and just as I opened the door to let out the dog she began with "Baby, What would it take to get you to quit smoking, Cause Ya know...... I really like the way you smell when you get out of the shower, so fresh, and clean; (insert momentary dramatic pause here while she puts her thoughts in order) But when you smoke did you know that your not very edible." Yup, it took me a few moments to process that as well... lol
Now I have been accused of many things, but never did I once consider the palatableness of myself very important, of course I also never realized the carnivorous nature in my wife! (ok, so maybe i might have had a clue about that one) but with this new knowledge, and after hearing the rather "tasteful" concerns of my wife, I've decided that it might be time to start seriously considering the edibleness of myself. Therefore from this day hence I shall strive to become smoke free in order to attain that pinnacle of delectable pabulum she so desires. On that note I bid thee a "Scrumptious" afternoon.
Wednesday, January 10, 2007
Hell Yea!
The new year is here, and i have to say... I had one hell of a 2006. Hope everyone else had a great new year, and I look forward to another awsome 2007
Saturday, October 14, 2006
Poker Table #2
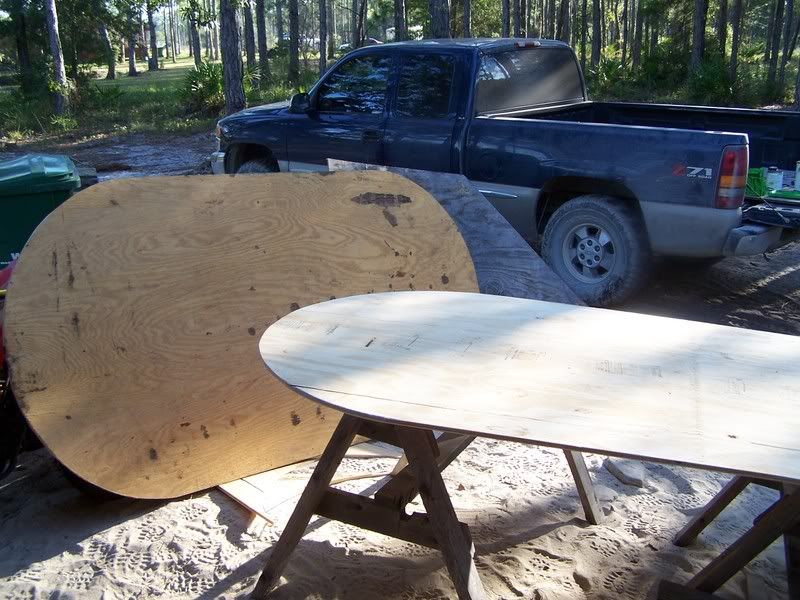
So, After building the first table... I had a request from the same estabilishment to build a second table, since the Sunday games had a boost in players. This time i toook a few more pics.. I followed most of the same things done at this url and there are many others here.
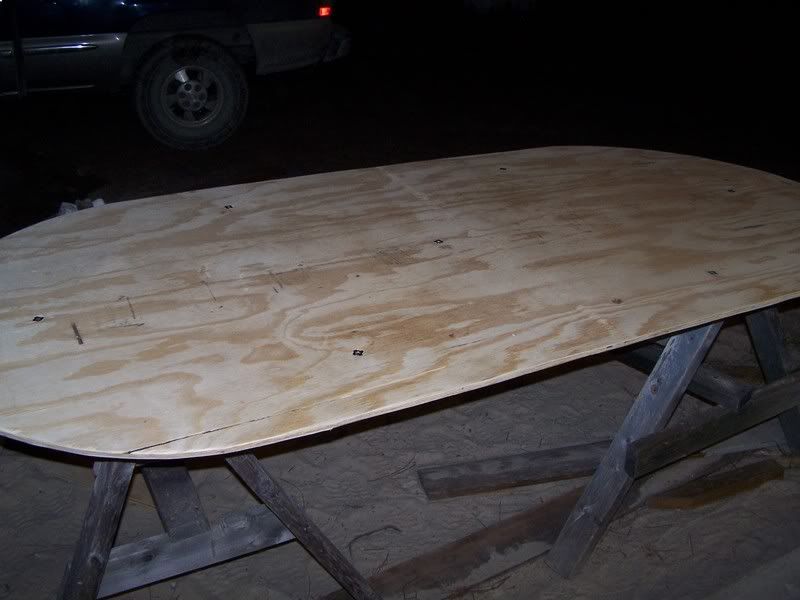
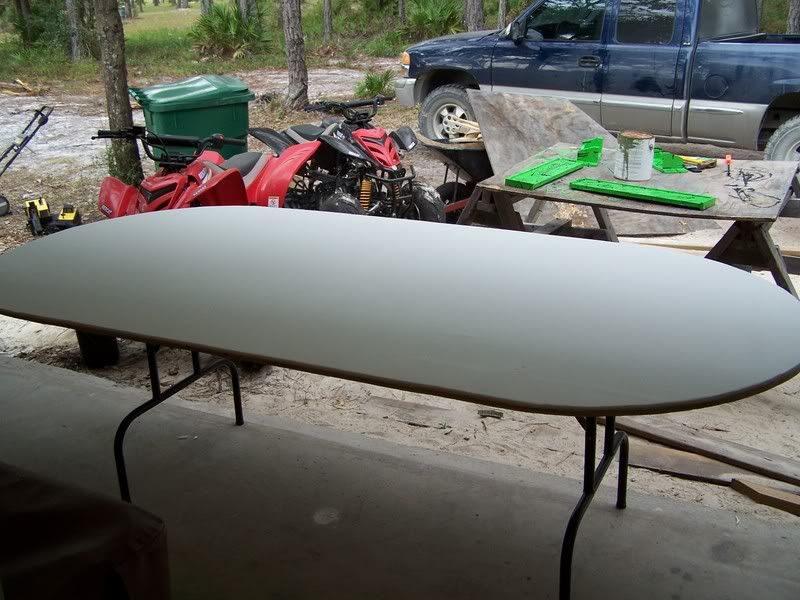
Nothing too hard here, just rounded the corners off.

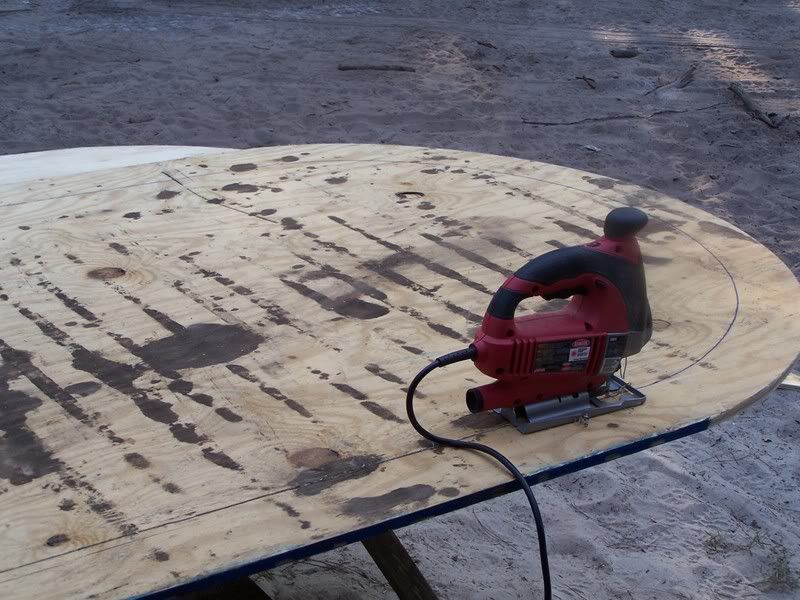
Cutting out the 4" rail from what will be the bottom part of the table. This will be the one that also gets the folding legs attached to it.

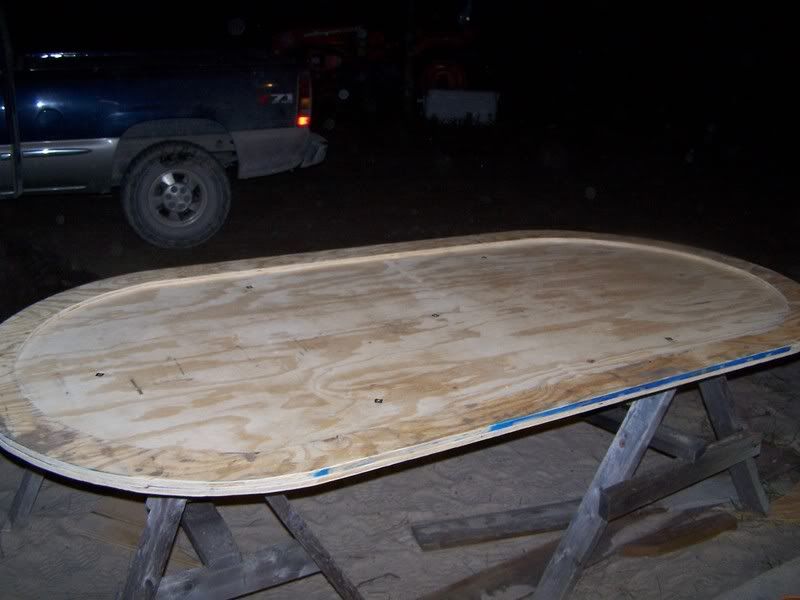
Cutting out a 2" rail out of the playing surface, this will mount to the bottom of the 4" rail so it will fit perfectly to the playing surface later. Most others have only cut this 1", This seems crazy to me. why cut only a 1" rail? It's going to be way to fragile, you'll have to glue it to the 4" rail, and you know it's probably going to break on you. Instead I cut this 2", your not going to loose any play area since its covered anyway, plus #6x1" drywall screws hold it perfectly, and i don't have to wait for glue to dry.

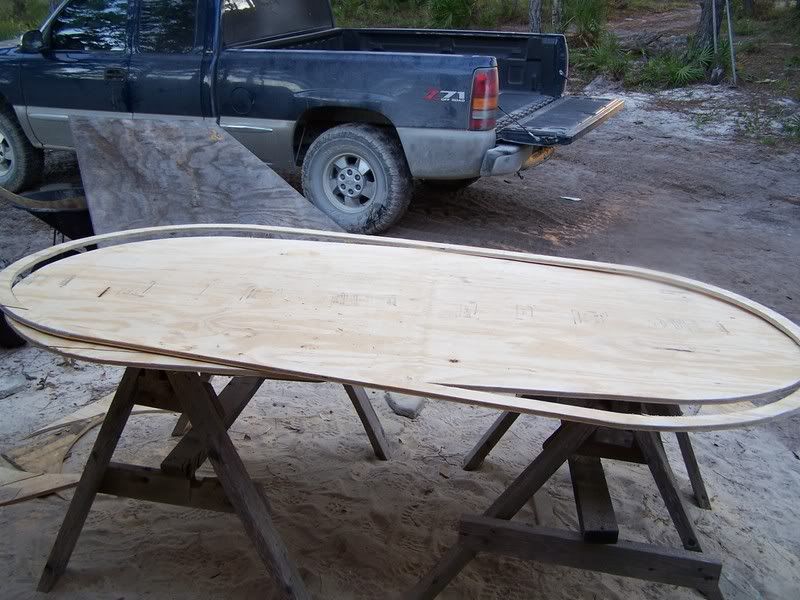
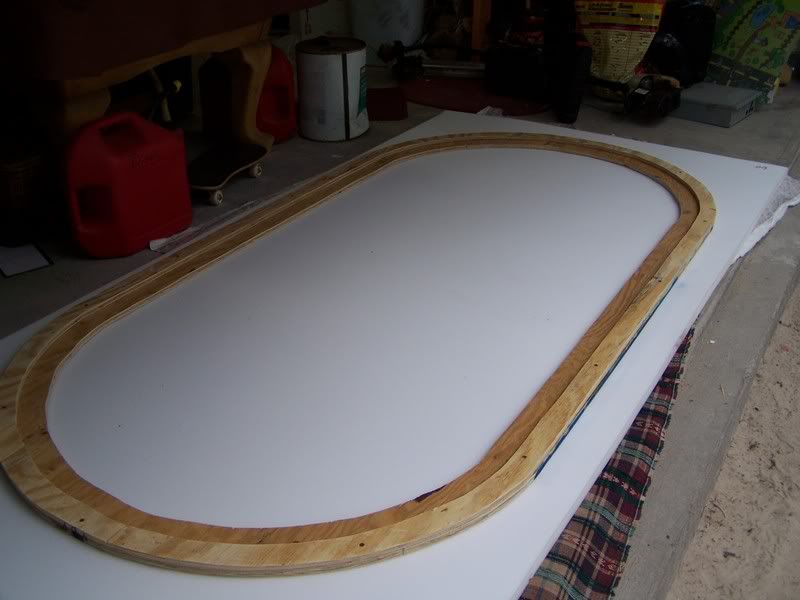
Here is the assembled rail..

I went ahead an from previous experience found it better to go ahead and mount the T-nuts to the bottom half. This way it pulls them flush agains the playing surface. In my first table until i mounted the playing surface there were bumps in the cloth. This eliminated that and I was pleased with the results later.

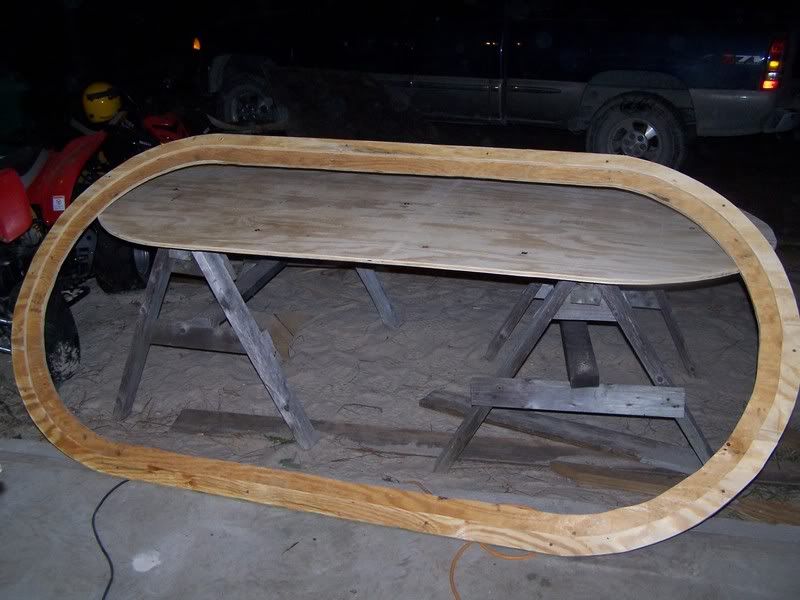
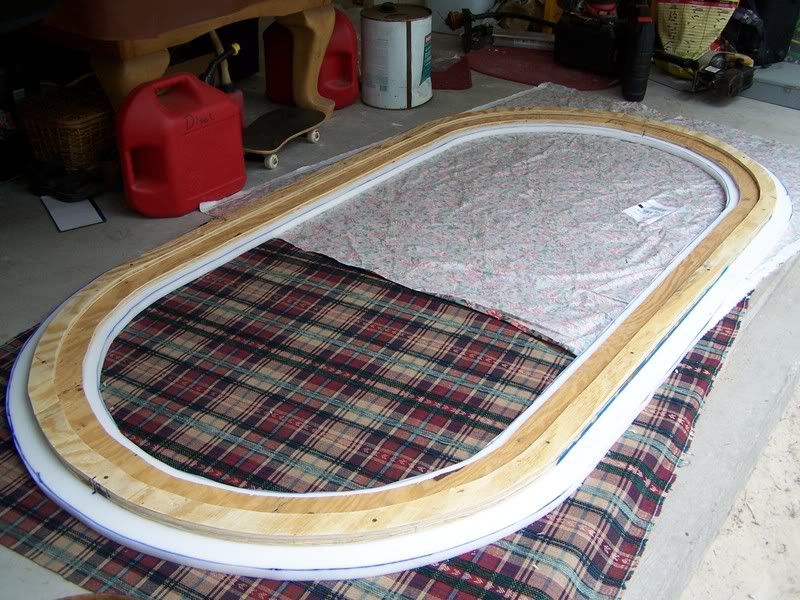
Testing the fit of the assembled rail and playing surface. Also took a moment here to mark one side so i would know witch way to put it on later.

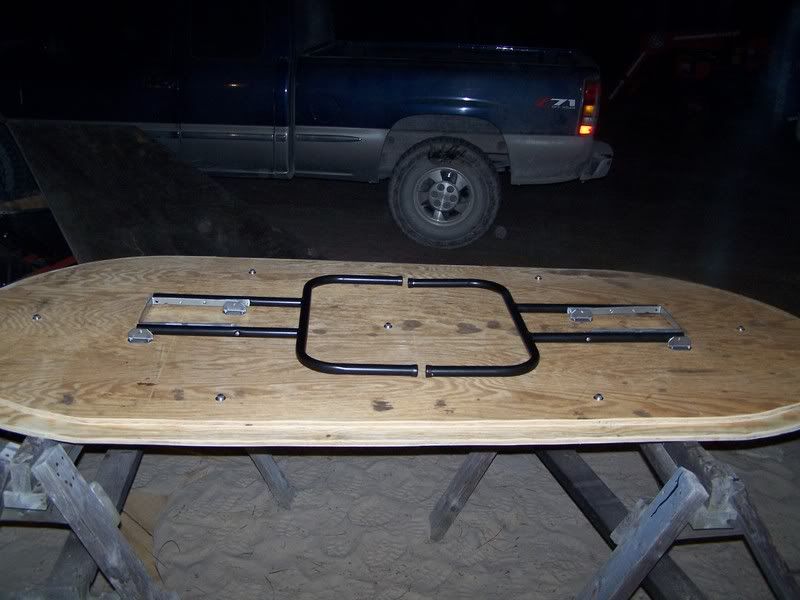
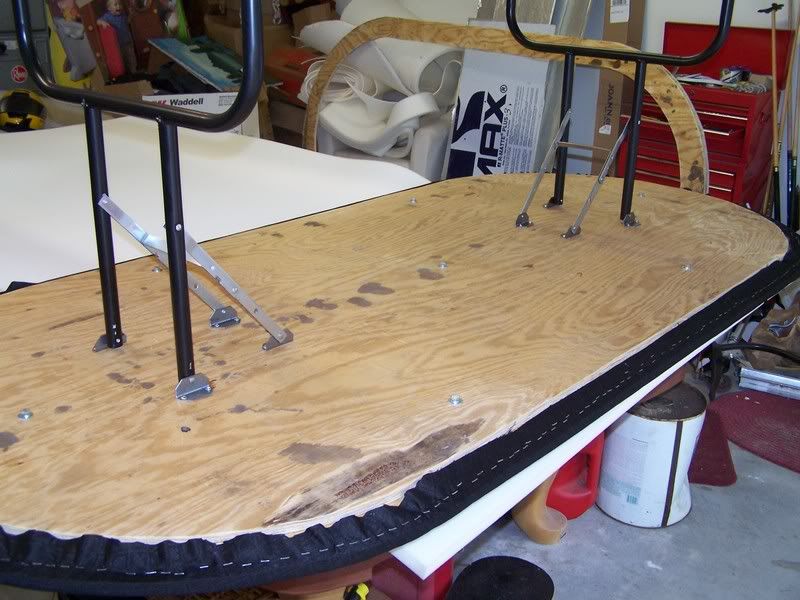
Mounted the folding legs to the bottom half.

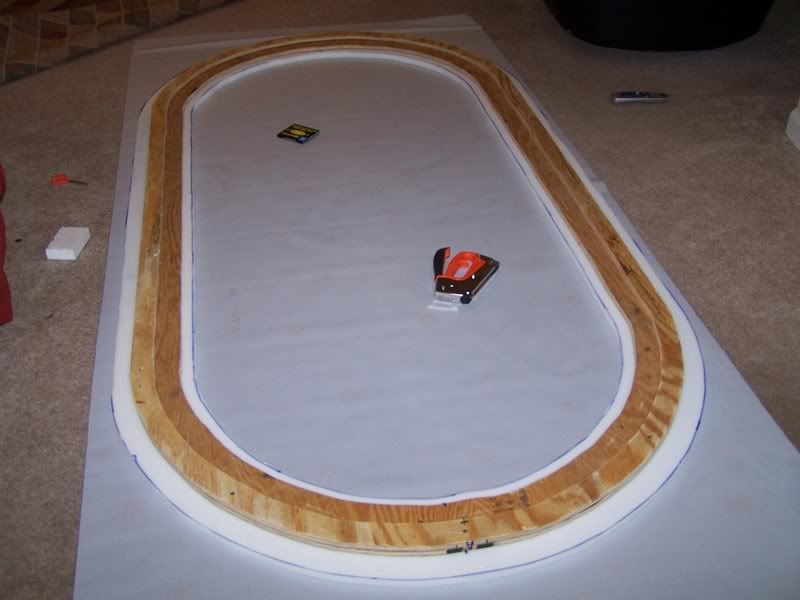
Whahoo, it's now standing on its own 2 legs.. haha.. Next up.. foam, but before that I took some masking tape and covered the T-Nuts. This will help keep it slightly smoother, and keep the spray adhesive from getting on the bolts.

Foam Cut and ready for the cloth. Again this process it pretty well documented by others out there.. Just layout the foam, lift one side, spray down the adhesive , roll foam down working out the bumps, then repeat on the other side..

This was pretty easy, even for one person. I started on each side in the middle and just worked towards the curves. Then once on the curves I started in the center of the curve, then split that in half and worked backed towards the center. You don't have to really pull it tight, just keep the creases out and it will be nice and snug when your done.

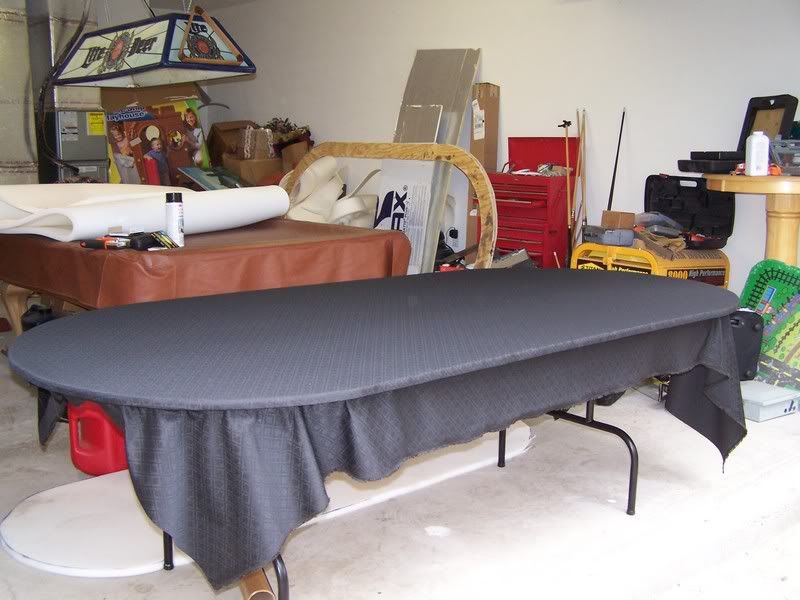
Cloth finished and trimmed. Dunno about other people, but my stapler and my use of it is nowhere near perfect, so after getting trimming off the excess cloth i went around with a hammer to make sure all the staples where in completly.

Now time to foam the rail. All i did here was mark out 2 dots at either end on the foam, had the wife help me flip it over onto the saw horses, put on the spray adhesive and flipped it back onto the foam.. Then let is sit for awhile to dry..

Next , trim off the excess foam. I measured 1" around the inside, and 2" around the outside.

This is probably the most time consuming part of the whole process. I could have never got this done without the wife's help. Lots-O-Stapling and pulling.

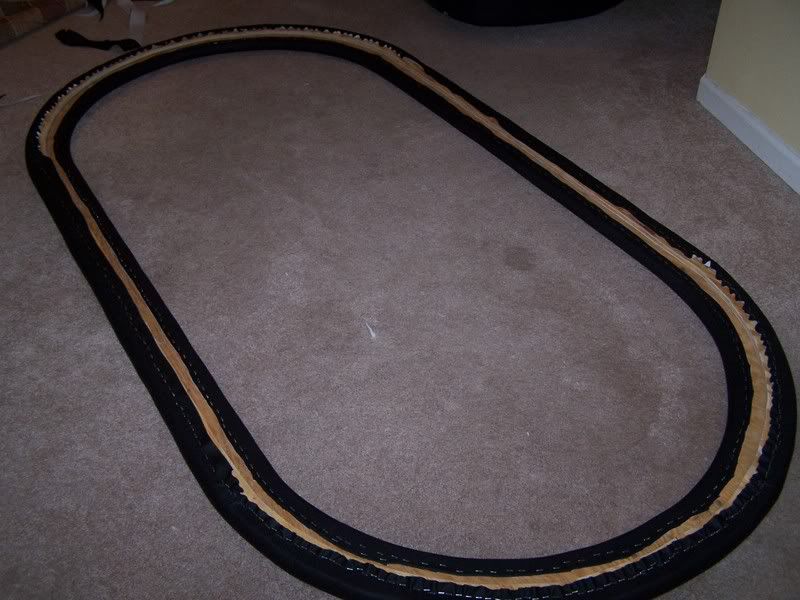
30 min later, and after trimming off the excess...

A finished rail. Damn I love how smooth this turned out..

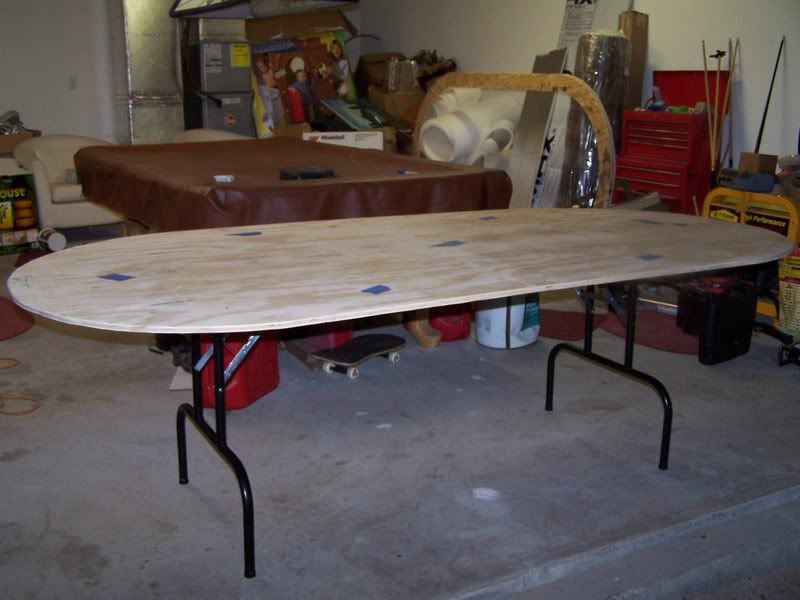
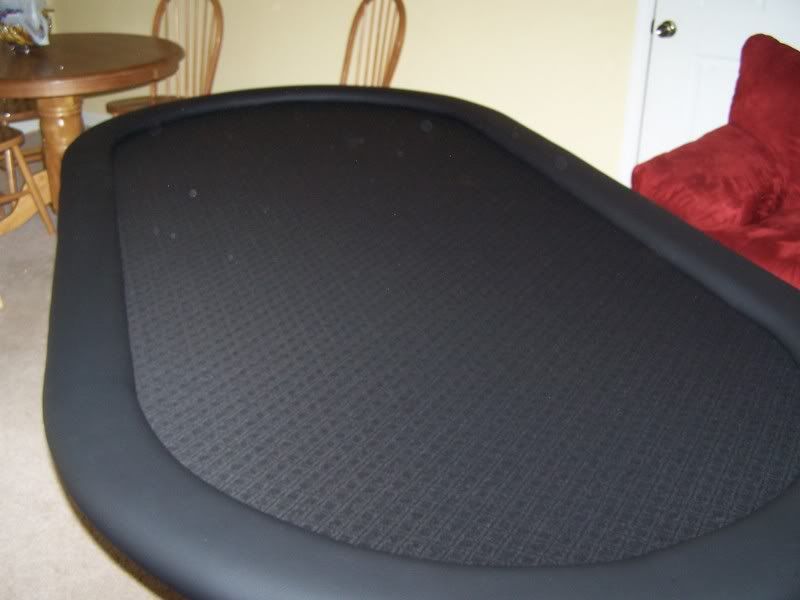
A Finished table. This one turned out much better than the first table.
One thing that i did'nt take a pic of is to secure the rail to the table, i bought some steel plates called mending plates. Using those helped pull the rail tight against the playing surface. And thats about it, Now it will be taking down to the Sunday Game.. whahooo!
Nothing too hard here, just rounded the corners off.
Cutting out the 4" rail from what will be the bottom part of the table. This will be the one that also gets the folding legs attached to it.
Cutting out a 2" rail out of the playing surface, this will mount to the bottom of the 4" rail so it will fit perfectly to the playing surface later. Most others have only cut this 1", This seems crazy to me. why cut only a 1" rail? It's going to be way to fragile, you'll have to glue it to the 4" rail, and you know it's probably going to break on you. Instead I cut this 2", your not going to loose any play area since its covered anyway, plus #6x1" drywall screws hold it perfectly, and i don't have to wait for glue to dry.
Here is the assembled rail..
I went ahead an from previous experience found it better to go ahead and mount the T-nuts to the bottom half. This way it pulls them flush agains the playing surface. In my first table until i mounted the playing surface there were bumps in the cloth. This eliminated that and I was pleased with the results later.
Testing the fit of the assembled rail and playing surface. Also took a moment here to mark one side so i would know witch way to put it on later.
Mounted the folding legs to the bottom half.
Whahoo, it's now standing on its own 2 legs.. haha.. Next up.. foam, but before that I took some masking tape and covered the T-Nuts. This will help keep it slightly smoother, and keep the spray adhesive from getting on the bolts.
Foam Cut and ready for the cloth. Again this process it pretty well documented by others out there.. Just layout the foam, lift one side, spray down the adhesive , roll foam down working out the bumps, then repeat on the other side..
This was pretty easy, even for one person. I started on each side in the middle and just worked towards the curves. Then once on the curves I started in the center of the curve, then split that in half and worked backed towards the center. You don't have to really pull it tight, just keep the creases out and it will be nice and snug when your done.
Cloth finished and trimmed. Dunno about other people, but my stapler and my use of it is nowhere near perfect, so after getting trimming off the excess cloth i went around with a hammer to make sure all the staples where in completly.
Now time to foam the rail. All i did here was mark out 2 dots at either end on the foam, had the wife help me flip it over onto the saw horses, put on the spray adhesive and flipped it back onto the foam.. Then let is sit for awhile to dry..
Next , trim off the excess foam. I measured 1" around the inside, and 2" around the outside.
This is probably the most time consuming part of the whole process. I could have never got this done without the wife's help. Lots-O-Stapling and pulling.
30 min later, and after trimming off the excess...

A finished rail. Damn I love how smooth this turned out..
A Finished table. This one turned out much better than the first table.
One thing that i did'nt take a pic of is to secure the rail to the table, i bought some steel plates called mending plates. Using those helped pull the rail tight against the playing surface. And thats about it, Now it will be taking down to the Sunday Game.. whahooo!
Monday, October 9, 2006
Another Project Done!
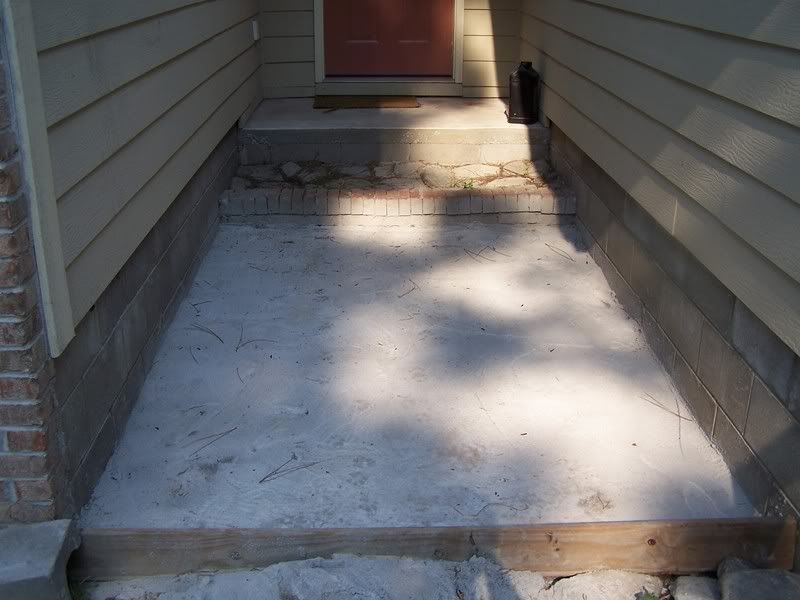
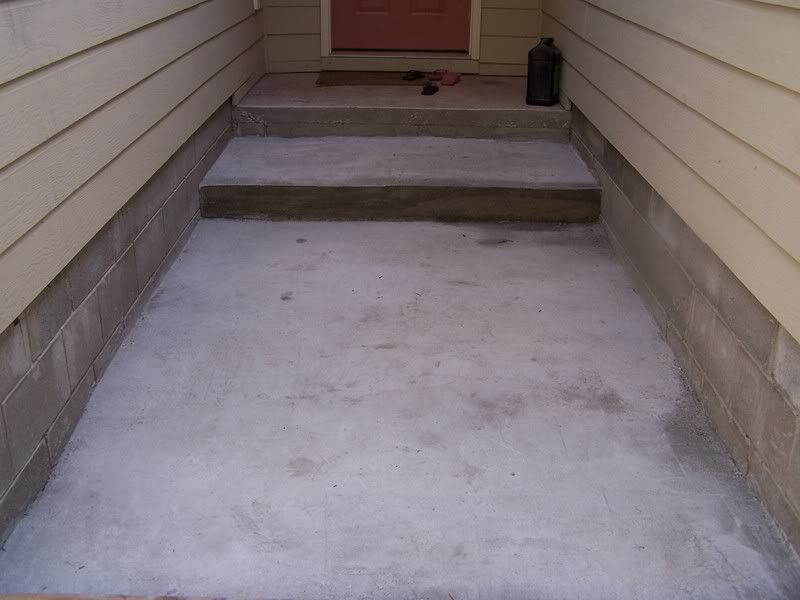
Unfortunatly, I did not get a chance to take before photos... but here was my first concrete job that i got finished this weekend, with the wifes help of course.. turned out pretty good. This is after i poured the first layer of the walkway, but before i poured the step..


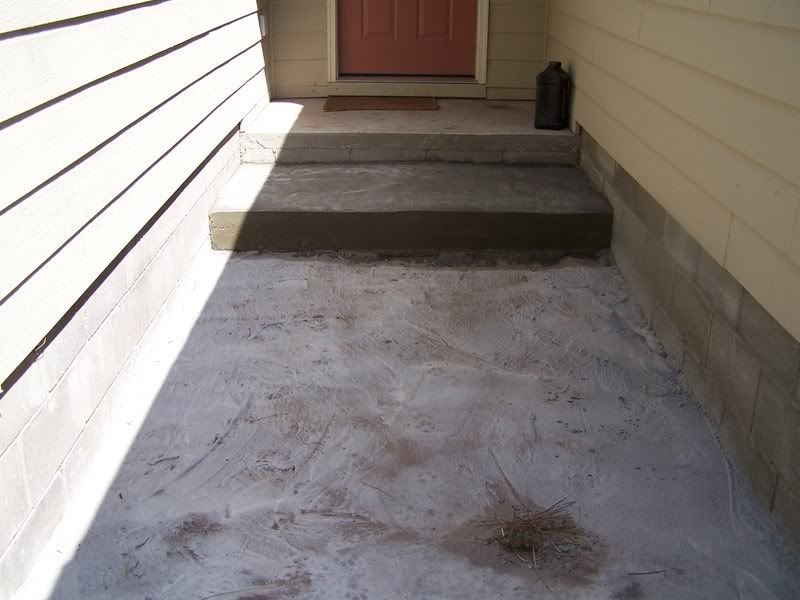
Next, I poured the step...


Finally, I poured a second layer on the walkway..


Not Bad for a first timer lol.. My Next project is another poker table, this time i'll take some really good progress pics :)

Next, I poured the step...
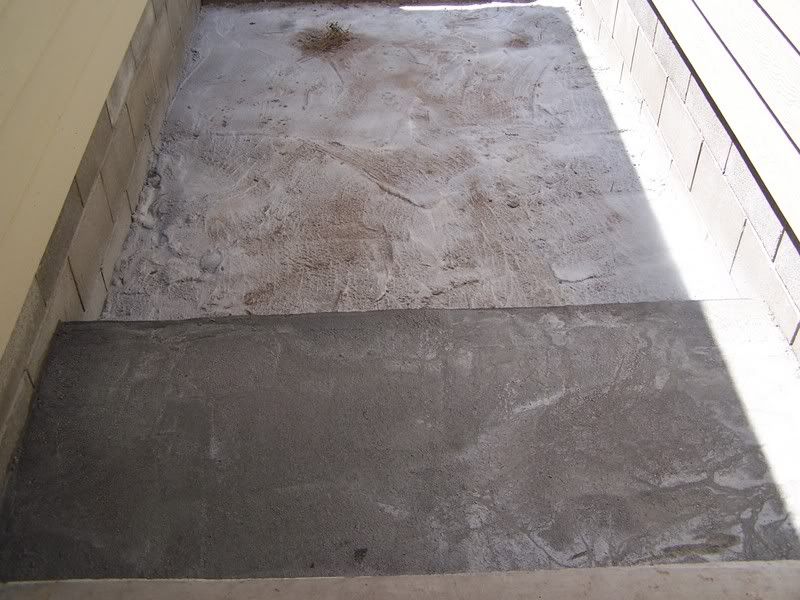
Finally, I poured a second layer on the walkway..
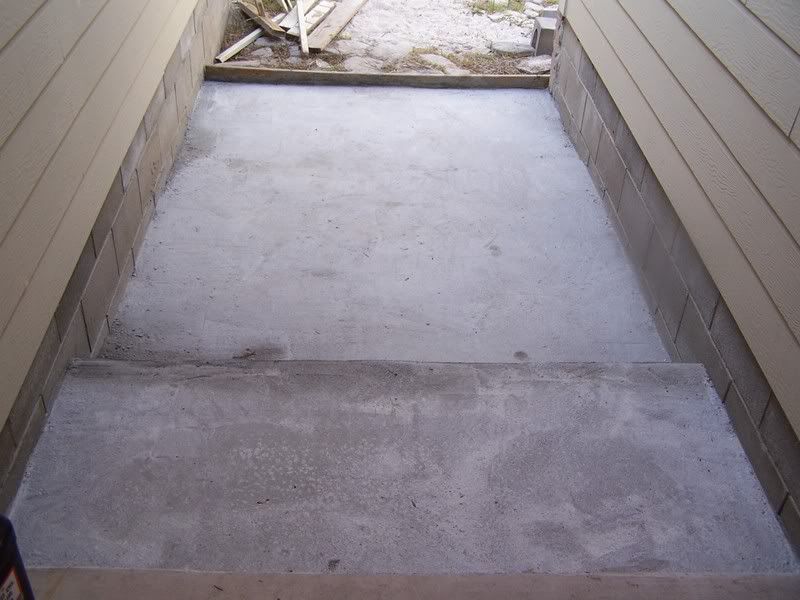
Not Bad for a first timer lol.. My Next project is another poker table, this time i'll take some really good progress pics :)
Too Funny...
While on our way to tampa one time, as we passed through Brooksville, the wife snapped this pic of a sign...This should go under one of those catagories of things that you should not put on a church sign! LOL

Photo Disclaimer:
This was a photo taken by me personally, feel free to repost or download the pic if you want. I only ask that you link back to this post. Thanks

Photo Disclaimer:
This was a photo taken by me personally, feel free to repost or download the pic if you want. I only ask that you link back to this post. Thanks
Subscribe to:
Posts (Atom)